Published
- 2 min read
How To Screenshot On Mac And Crop
by Hong Cheung
Intro
There are no Screenshot buttons on a Mac like on Windows devices, so how do you take a screenshot on a Mac? How do you select and crop a screenshot?
Luckily, macOS provides built-in ways to take a screenshot however you want. You just need to learn a few keyboard shortcuts for the action you want.
You can either select an area to take the screenshot beforehand or crop it later. I will show you every possible way.
Here’s how you can take a screenshot in different ways:
Full-screen screenshot
You can make a full-screen capture by pressing these buttons at the same time:
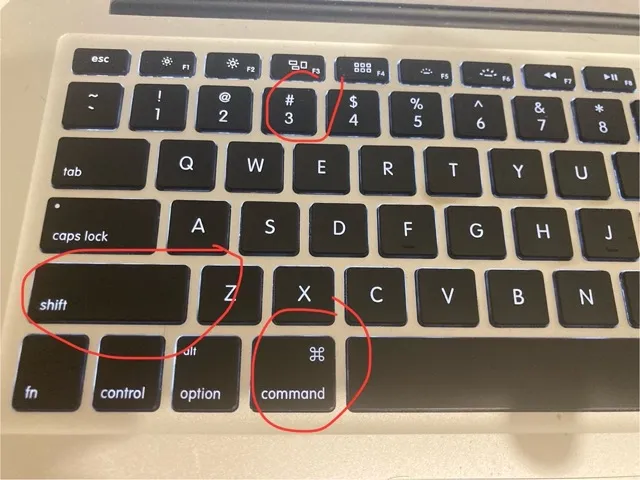
command + shift + 3
Tips: You don’t have to press it all at once. Use your thumb to press and hold the command button, then pinky press and hold on the shift button, and index for number 3.
Selected area screenshot
You can make a cropped screen capture too. So you don’t need to crop later on.
The keyboard shortcut for this is:
command + shift + 4
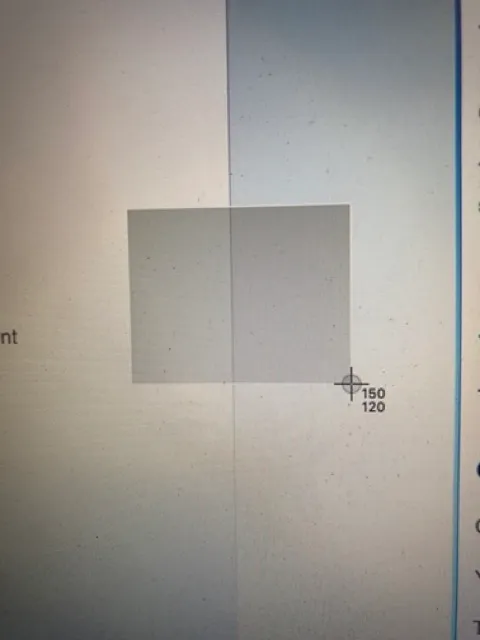
Once you press these three buttons at the same time, you will notice your mouse pointer icon has changed.
You can now click and drag the exact area on the screen you want to screenshot.
The tidy numbers on the corner show the x and y dimensions for your selected area.
It is useful for precise capture, so you can avoid screenshotting unrelated personal information.
Advanced screenshot control
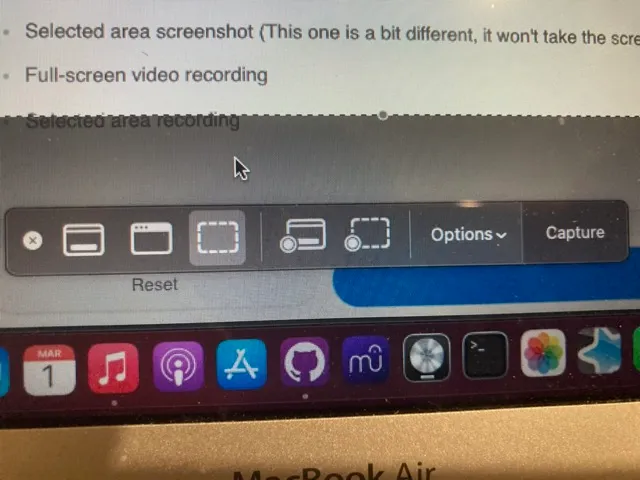
With the following combination, you can select which window to capture, which area to capture and even make screen recording:
command + shift + 5
The menu allows you to select everything we mentioned above:
- Full-screen screenshot
- Selected area screenshot (This one is a bit different, it won’t take the screenshot unless you click the “Capture” button)
- Full-screen video recording
- Selected area recording
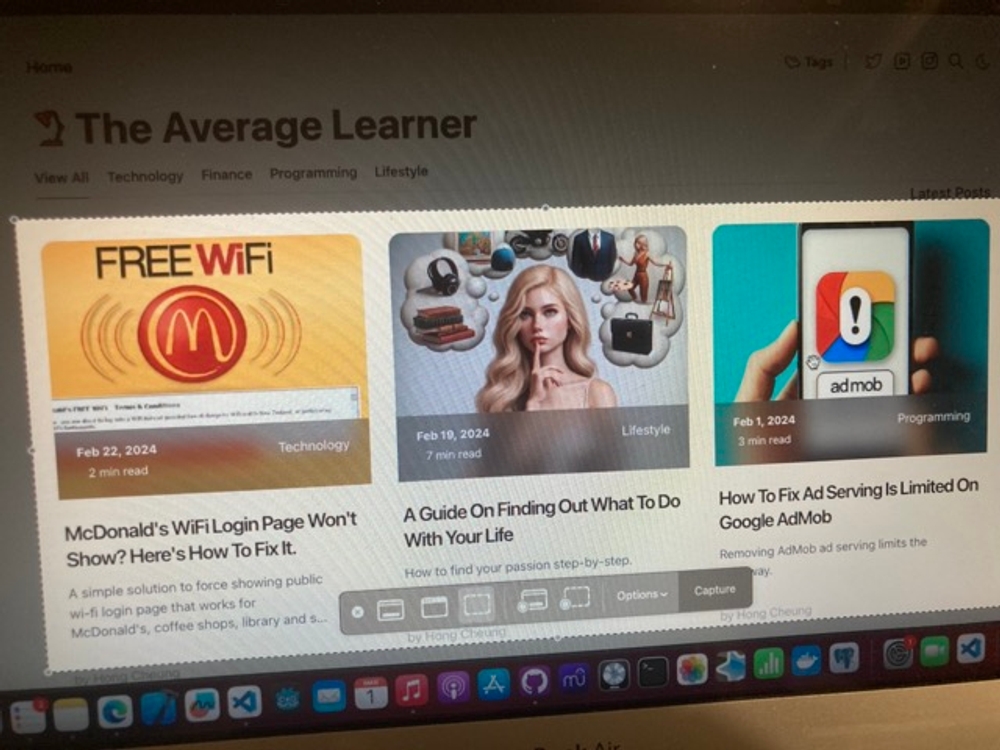
There are also some options for you to change based on your needs. By default, your screenshots are saved to the desktop.
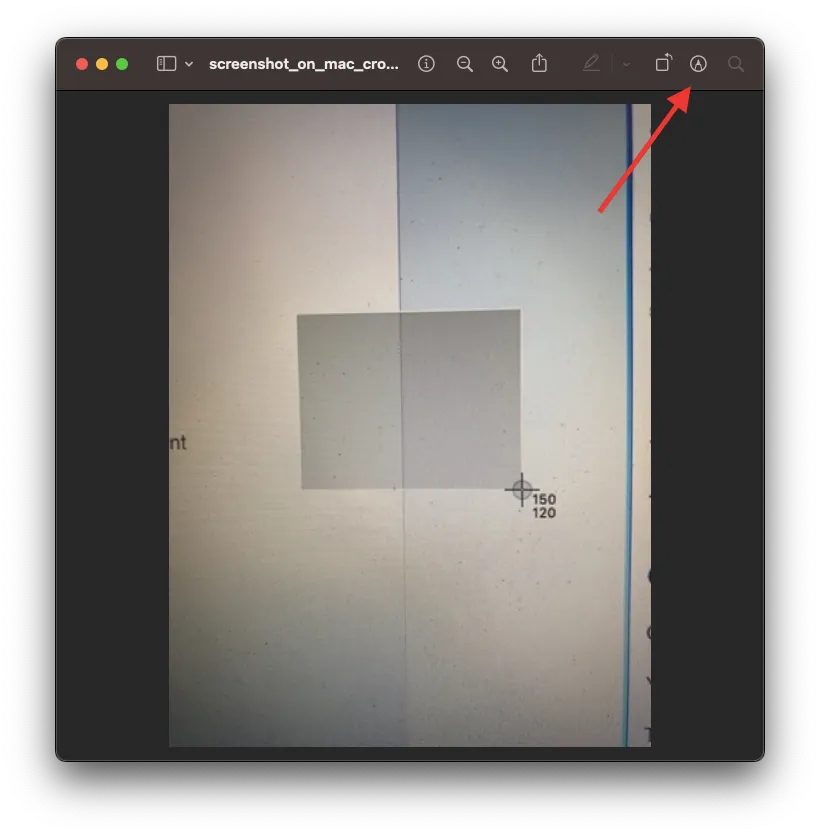
Cropping a screenshot (after it is taken)
- Open your screenshot or picture. (Use double click, don’t just tap the space bar because it only opens the preview not the editor.)
- Select the edit button.
- Select the cropping tool.
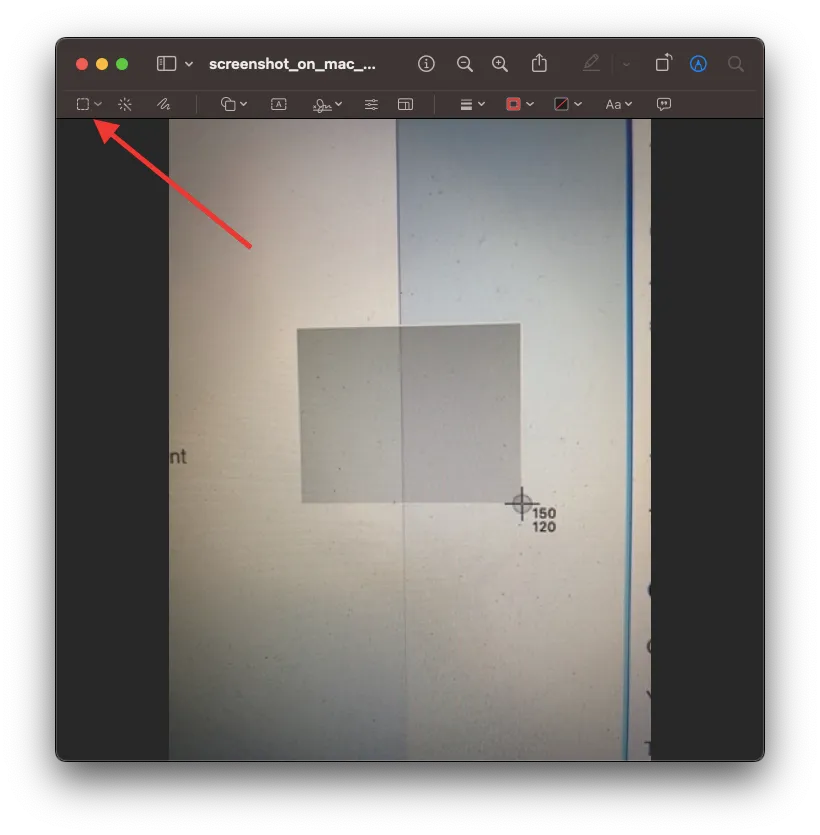
- Select the area you want to crop and hit this crop button.
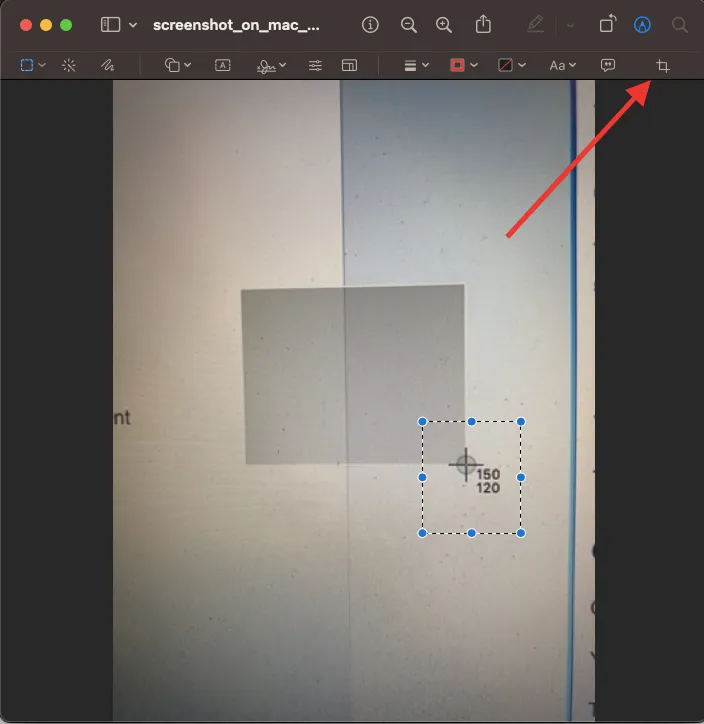
- Now it is cropped, you can save it, enjoy!
Check out some of my apps...